Tomato Relish

Tomato RelishOk, This will be a quick post.  We have a friend that has had our Tomato Relish and wants it, so here it is.

Oh, and the difference between relish, tapenade, salsa, chutney and all other sorts of toppings?

Quick overview.

Pickle: preserve (food or other perishable items) in vinegar, brine, or a similar solution.

Relish: A piquant or spicy condiment eaten with food to add flavor; specifically a sauce made of chopped pickled vegetables.

Chutney: a spicy condiment made of fruits or vegetables with vinegar, spices, and sugar, originating in India.

Salsa: a spicy tomato sauce.

Tapenade: a Provençal paste or dip, made from black olives, capers, and anchovies.


Basically, a relish is chopped and pickled vegetables, and a chutney is a particular type of relish (of which Tomato Relish is NOT).  Also, Even though this uses tomatoes, it is not spicy, so it is not a salsa.  Also?  No capers, olives, or anchovies, so tapenade is completely out.

“Relish” will have to do.


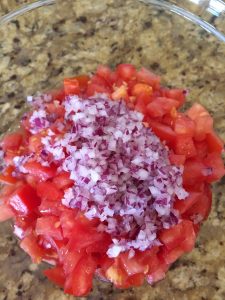
Chop up a couple of tomatoes.  Finely dice red onion.  Put them in a bowl.

Tomato Relish


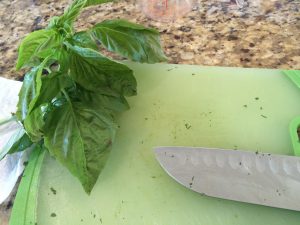
Chop some fresh basil (love that stuff!). Add it to the bowl.

Tomato Relish Tomato Relish

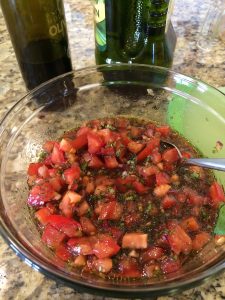
Add olive oil and a good balsamic vinegar, salt and pepper to taste and stir together.  Oh, and a good balsamic vinegar should be a taste thing, not an expensive thing.  $18-20 for a bottle should be sufficient, don’t go get that $60 bottle, and for the love of all that is good in the world, do NOT get the $4 bottle!  it won;t be balsamic vinegar, check the label.  If it says “musk wine”, then ditch it; that stuff is vile and not actually balsamic vinegar.  Wine musk is the dregs at the bottom of the wine barrel after they take out most of the wine.  Eww.

We buy from Mountain Town Olive Oil Company in Provo, at the River Bottoms shopping plaza.

Oh, and the relish is great right after made, but even better after a few hours.  But not the next day, not so much, so eat it fresh.

Tomato Relish


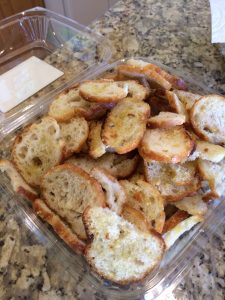
Buy or make some Crustini.  We bought here because we were in a hurry, but a decent loaf of crusty bread cut into 1/4″ slices, lightly brushed with olive oil then broiled until toasted will do just fine.  If you want to be authentic, cut a clove of garlic in half and rub all over the bread as soon as it comes out of the oven, while still hot.  Mmmmm.
Tomato Relish


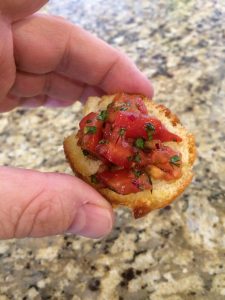
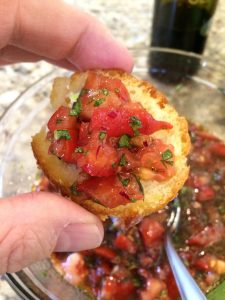
Put some of the relish on the Crustini and enjoy.

Tomato Relish


Tomato Relish
Author: 
Recipe type: Appetizer
Cuisine: Italian
Prep time: 
Total time: 
Serves: 1 bowl
 
Simple, fresh, and delicious topping for Crustinis or crusty bread
Ingredients
  • 4 cups diced tomato (2-3 large tomatoes)
  • ¼ cup red onion, minced
  • ¼ cup fresh basil, chopped
  • ¼ cup balsamic vinegar
  • ¼ cup olive oil, extra virgin
  • salt and pepper to taste
Instructions
  1. Stir together all ingredients in a bowl.
  2. May eat immediately, or let it blend for an hour or two. Eat while fresh, does NOT keep very well overnight.
  3. Server with Crustini or on slices of crusty bread.


Beet Gratin

beetsI was visiting a friend yesterday that has a large and wonderful garden, and I particularly noticed her beets, all in nice rows.  We got to talking, and I mentioned an amazing Beet Gratin recipe I have.  Was she interested?  Of course!  So I dug it out, and I am putting it here for perusal.

Sadly I did not create it or write it, etc, but I cannot now find it online, so to allow the world to have this creation I am putting it here.  It was originally Golden Beet Gratin, but I can never find those so I made it with regular beets, and it is the best beet dish I have ever had.

Enjoy!


Beet Gratin
Author: 
Recipe type: Side Dish
Cuisine: American
Prep time: 
Cook time: 
Total time: 
Serves: 8-10 servings
 
Best Beet dish I have ever had.
Ingredients
  • 6-8 red beets
  • 2 lb beet greens

  • ¼ cup water
  • 1 Tablespoon salt (for blanching water)

  • 4 eggs, beaten
  • ¾ teaspoon salt
  • pepper to taste
  • ¾ cup milk
  • 1 large garlic clove, minced
  • ½ cup Gruyere cheese, grated
  • ¼ cup Parmesan cheese, grated
  • 1 Tablespoon Olive Oil
Instructions
  1. Preheat oven to 425 degrees. Cut greens off beets, leaving ½" of stems. Scrub beets and place in baking dish. Add ¼" water. Cover tightly and bake 35-40 minutes, or until tender. Remove from heat and let cool.
  2. Bring large pot of water to a boil. Stem and wash greens. Add 1 Tablespoon salt to water and blanch greens for a minute or two. Transfer to bowl of cold water, drain, squeeze out water, and chop coarsely. Set aside.
  3. Preheat oven to 325 degrees. Oil 2-quart gratin dish generously with olive oil. Slip skins off beats and slice thin. Beat eggs, ¾ teaspoon salt, pepper, milk, garlic, and all but two Tablespoons of cheeses. Stir into chopped greens.
  4. Make the gratin. Line bottom of dish with sliced beets, overlapping slightly. Add layer of the greens mixture. Continue to make 2-3 layers, depending on the size of the gratin dish. Be sure the top layer is beet slices. overlapping slightly. Sprinkle remaining 2 Tablespoons of cheese over beets and drizzle with olive oil.
  5. Bake 35-40 minutes, until set and lightly browned. Allow to sit 10-15 minutes before serving, to cool slightly and finish setting the gratin. Serve hot or warm.


Cheese Drop Biscuits

cheese drop biscuitsI love biscuits.  I mean, who doesn’t, right?  Those fluffy, tender, savory quick breads are just the right start to many a morning, a perfect side for casual or formal dinners, and balance soup perfectly.  You can eat them with butter, jam, honey, sausage gravy, or just by themselves.

The problem for me is the time they take.  You mix them up, then roll them out.  You cut those circles out, making sure to not twist so they will rise as high as they can.  then you gently mix the rest back together, and do it again, making them a little less tender each time.  They are simple, yet require practice to master them and most of us have to try several times to get past ok, and up to good.  great is a ways off for the beginning biscuit maker.

What if there was a better, easier, faster, and more simple way to make great biscuits?  I am talking dump it all into a bowl, mix it, slap it onto a pan and bake it.  I am talking about wonderful flavor, that most people will snarf as many as you will let them.  I am talking about Cheese Drop Biscuits!


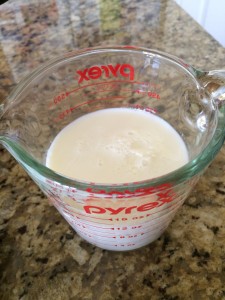
Start by making sour milk.  It’s really easy, and can directly replace buttermilk in many recipes.  For each cup you need, put one tablespoon of lemon juice into the measuring cup, then fill the rest of the way to the cup mark with milk.  Wait five minutes.  Use like buttermilk.

Having said that, you are free to use buttermilk in any recipe that asks for sour milk, and vice versa.  The main thing to keep in mind is that buttermilk may be thicker, so pancakes and biscuits may have a little more structure to them.  Both are good; see what you like best.  I tend to use a lot more sour milk in recipes than buttermilk, simply because lemon juice in the fridge will last a lot longer than buttermilk.

cheese drop biscuits

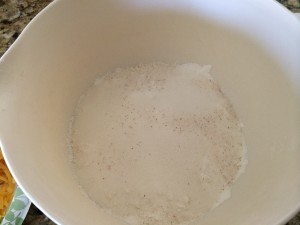
Meanwhile, stir together the dry ingredients in a bowl.

cheese drop biscuits

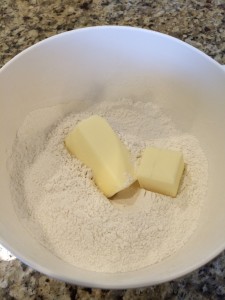
Add the butter, right from the fridge.  Pastry cooking almost always does better with really cold butter.  (sometimes it will specify ‘room temperature” or “melted”.  I usually suggest following a recipe the first time you make it, then adapting as you feel you should).

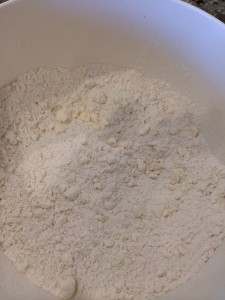
Chop, and blend the butter into the dry ingredients until the largest pieces are about the size of a pea (1/4 inch).  You can use two knives, or you can chop a little and then pinch the bits of butter into the flour.  Or you can use a pastry cutter.  They make this step really fast and easy, and anyone who bakes should have one.

cheese drop biscuits cheese drop biscuits

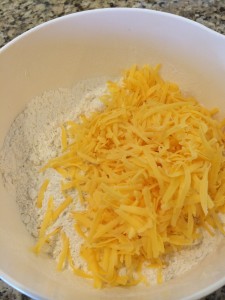
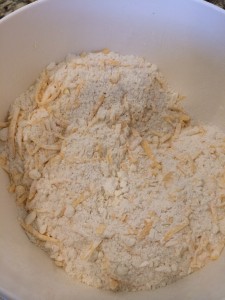
Now add the grated cheese and stir it together.  This will help it stay throughout the entire biscuits once the liquid is added.  Adding the cheese after the liquid is a battle to get it all mixed without pulverizing the cheese.  And yes, I like medium or sharp cheddar.  Oh, and the cheese amount is fairly forgiving, so if you put in too much, or sampled the cheese and have a little less, you’ll be OK.

cheese drop biscuits cheese drop biscuits

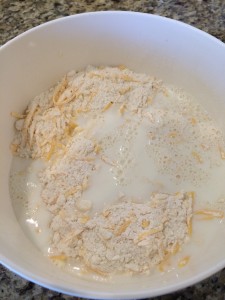
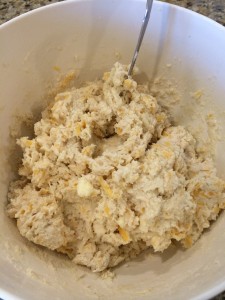
Now add the sour milk (or buttermilk), and stir it all together just until all the dry bits are gone and nothing is overly goopy.  Yes, goopy is a highly technical term.

cheese drop biscuits cheese drop biscuits


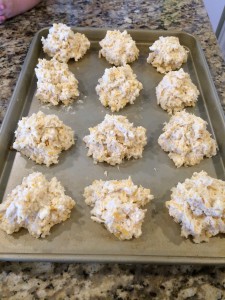
Now drop big blobs, chunks, or whatever you want to call them, onto a cookie sheet.  I suggest a non-stick cookie sheet, or put down parchment paper or a silicone baking mat, like the famous Silpat).  Try to make them about the same size.  I usually end up with 12 or 15, but 18 will also be fine.  just keep in mind that 12 will take a little longer to bake than 18.

cheese drop biscuits

Bake them at 425 degrees for 15-20 minutes (again, less for 18 biscuits and more for 12 biscuits).  Check them when you think they may be done by breaking one open.  Tender and full of steam (but not dry), it is done.  If it’s sticky or gooey inside, put it back into the oven for a few more minutes.

cheese drop biscuits


Cheese Drop Biscuits
Author: 
Recipe type: bread
Cuisine: American
Prep time: 
Cook time: 
Total time: 
 
Fluffy, tender, simple to make, flavorful biscuits
Ingredients
  • 3½ cups all purpose flour
  • 3 tablespoons + 1 teaspoon baking powder
  • 5 teaspoons sugar
  • ½ teaspoon salt
  • 12 tablespoons butter, cold (1½ sticks)
  • 1½ cups milk
  • 1½ tablespoons lemon juice
  • 2½ cups sharp cheddar cheese, grated
Instructions
  1. Make the sour milk by putting the lemon juice into a measuring cup and filling the rest of the way to 1 /12 cups with milk. Set aside.
  2. Stir together dry ingredients.
  3. Cut into dry ingredients the cold butter, until the largest pieces are the size of a pea (1/4 inch)
  4. Stir in grated cheese.
  5. Add sour milk. Mix together just to the point that there is nothing left dry.
  6. Drop onto non-stick cookie sheet into 15 even portions.
  7. bake at 425 degrees for 15-20 minutes, or until the tops are golden brown and the insides of the biscuits are no longer gooey (moist is fine).

    Buttermilk may be substituted for the sour milk.

    recipe may easily be halved if less biscuits are required.