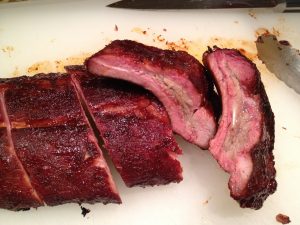
Baby Back Ribs

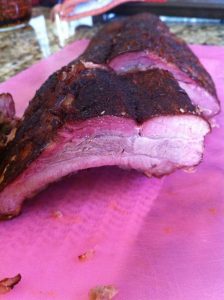
Average NinjaMmm, yeah!  Baby Back Ribs.  It doesn’t get any better than this!


Honestly, I borrowed most of the dry rub from Alton Brown, of Good Eats fame.  Great show.  It will teach you to cook better than any of those BAM shows or the Blue Tortilla guy ever will.

I like his rub and his braise, but Baby Back Ribs should have smoke.  ‘Nuff said on that.

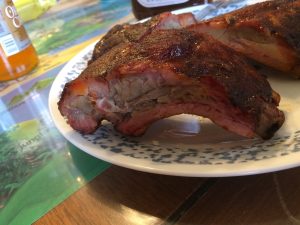
Also?  they are done when the bone wiggle a little, but does not come free without a little effort.  You want your ribs to be tender but have some toothsome feel to them.  Fall off the bone is overdone, though still tasty.  I won’t throw out a fall off the bone rib; I’ll simply adjust my time for the next batch.


Ok, the howto.

Put down a bunch of plastic wrap on the counter, making sure it overlaps.  This makes cleanup easier.

Open the pack of Baby Back Ribs and gently rinse them off.  Put them on the plastic wrap, and pat them dry with paper towels.

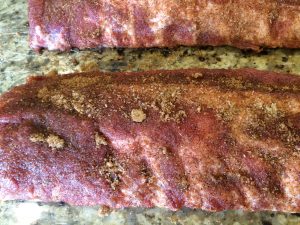
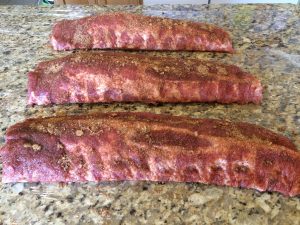
Evenly spread the dry run on the meaty side.  Rub it in, gently.  The batch of dry rub I’m listing below is good for three racks of ribs.

Baby Back Ribs Baby Back Ribs Baby Back Ribs


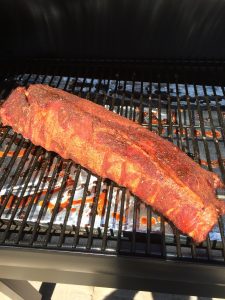
Put the ribs on the smoker.  Warm smoke them for three hours, at around 160 degrees.

Now get a large sheet of heavy duty aluminum foil, large enough for one rack of ribs plus about four inches on either end.  GENTLY put a rack of ribs in the foil, and fold up the sides, crimping the top together, plus one of the ends.  Leave the last end open, but a little bent upwards.  Do this for all three racks, but be very careful that the bones on the racks don’t make holes in the tinfoil.

[No photo here.  I seem to miss taking one every single time.]

Now make the braise liquid.  Pour 1/3 of it into each tinfoiled rack of ribs.  Gently crimp the last end.  Put all three of these in your oven on 225 degrees, or back on the smoker at the same temperature.  I use the oven, because I am not a fan of wasting wood to smoke tinfoil.

Cook for another three hours, or until the bones can gently wiggle, but not quite fall off the meat without pressure.

Drain the liquid, carefully.  It’s Hot!

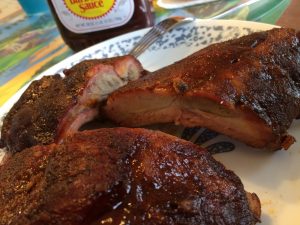
Now you must make a tough decision.  Wet, or dry?  If you like dry, cut them into two bone pieces, serve them and enjoy!  Personally, I like mine painted with my favorite BBQ sauce, then back on the smoker for another half hour.  it sets the sauce and adds just a hint more smoke.  The choice is up to you.  Choose wisely.

Either way, your dinner guests will snarf them up, and you will be sad the next day for no leftovers.  Or don’t invite anyone over, and have a lot for yourself.  or buy a second wire rack for the smoker, and do six instead of three!

Baby Back Ribs Baby Back Ribs Baby Back Ribs

Baby Back Ribs


Baby Back Ribs
Author: 
Recipe type: Entree
Cuisine: American
Prep time: 
Cook time: 
Total time: 
Serves: 3 racks
 
Baby Back Ribs! Awesomacity at it's finest! (yes, it's a real word!) (ok, maybe not, but it should be!) This is enough rub and braise liquid for three racks
Ingredients
  • Dry Rub
  • 8 Tablespoons brown sugar
  • 3 Tablespoons salt
  • ½ teaspoon black pepper
  • ½ teaspoon paprika, or smoked paprika
  • ½ teaspoon thyme
  • ½ teaspoon onion powder
  • ⅜ teaspoon cayenne pepper

  • Braise liquid
  • 1 cup water
  • 2 Tablespoons apple cider vinegar
  • 2 Tablespoons Worcestershire sauce
  • 1 Tablespoon honey
  • 2 cloves garlic
Instructions
  1. To make dry rub, put ingredients into a zip top bag and shake until well mixed.
  2. To make braising liquid, put ingredients into a microwave safe bowl and microwave on high for one to two minutes, immediately before pouring into the tinfoil.
  3. Open the pack of Baby Back Ribs and gently rinse them off. Pat them dry with paper towels.
  4. Evenly spread the dry run on the meaty side. Rub it in, gently.
  5. Put the ribs on the smoker. Warm smoke them for three hours, at around 160 degrees.
  6. Now get a large sheet of heavy duty aluminum foil, large enough for one rack of ribs plus about four inches on either end. GENTLY put a rack of ribs in the foil, and fold up the sides, crimping the top together, plus one of the ends. Leave the last end open, but a little bent upwards. Do this for all three racks, but be very careful that the bones on the racks don't make holes in the tinfoil.
  7. Now make the braising liquid. Pour ⅓ of it into each tinfoiled rack of ribs. Gently crimp the last end. Put all three of these in your oven on 225 degrees.
  8. Cook for another three hours, or until the bones can gently wiggle, but not quite fall off the meat without pressure.
  9. Careful draining the braising liquid, it will be hot. Cut ribs into two bone pieces and serve, or paint with your favorite BBQ sauce and smoke for another half hour, then cut and serve.

 

Family Friendly Chili

chiliBack in the early days of my hobby of cooking, we lived in Atlanta.  We had just moved there, and were starting to try new restaurants, food, and anything we could find that was “southern”.  There are a lot of amazing foods in Atlanta, and the people are awesome.  They are friendly, helpful and willing to share ideas and recipes (as long as they are not the family secret recipes. 🙂

Anyway, at church they announced a Cornbread and Chili Cookoff.  Can we participate?  sure.  How hard can those be?  They are basic dishes that everyone has a version of, so it shouldn’t be too difficult.  So we teamed up with out friends (Chad and Becky), and we started researching Chili recipes.  There were a lot of them.  And I mean a LOT.  But we wanted it to be out own, so we started mixing and matching bits from different ones.  And we came up with what Chad called “Jeremiah 4:19 Chili” (read the verse if you want in on the joke, because it was HOT).  We made some mistakes along the way, and we didn’t get the spices perfect, but it was a good chili, just way too hot.  This recipe is not that chili.

This recipe is a Family Friendly Chili, one you can feed the kids, friends, neighbors, etc, without just catering to those manly men who line up to prove their strength and worth.  You guys know who you are, claiming it doesn’t hurt, then sneaking around the table to the bread in an attempt to slow the pain ripping at your throat.  Again, this is not that chili.  Everyone can enjoy.

We aimed for a meaty chili with just a hint of heat.  Go ahead and try it, I think you’ll like it.  And then you can change it and make it your own, because that’s what chili is all about: sharing, enjoying, and bragging whose is the best.  It’s what family secrets are made of. 🙂


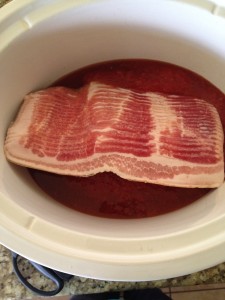
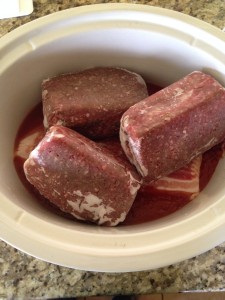
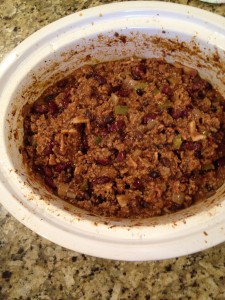
Add tomatoes, bacon, and hamburger to the crockpot, and cook it until it is done, but not mush.  From frozen, on high, this took us abut 3-4 hours.  Or you can do low overnight.

chili chili

Chop the onions and green pepper, and saute them until soft or translucent.  Add to the meat in the crockpot, along with the beans, garlic, and jalapenos.  I drain them first, but if you want a little more spice leave the jalapenos juice, and for a less thick chili don’t drain the beans.  Last, add all the rest of the ingredients and stir them in.

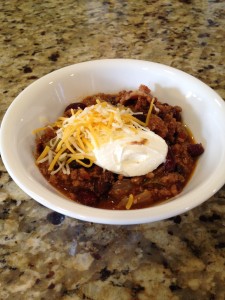
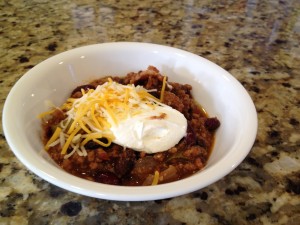
chiliSimmer for a few hours.  Then mix the corn starch and cold water until there are no lumps, and stir it into the hot chili.  Then serve some hot, with sour cream and cheese, and enjoy!

Or refrigerate overnight and reheat.  That will allow the flavors to blend even more.  Then serve with sour cream and shredded cheese.  And enjoy.

chiliAnd, of course, modify it as you wish.

Edit:  yeah, I lost in a local chili cook-off.  Well, I came in fourth.  I talked to the judge after, and he was judging almost solely on chili powder flavor.  To him, a chili is all about that specific flavor, and mine wasn’t.  Feel free to spice this as you like; after all, food, like art, should be catered to it’s audience.

NOTE:  I have been informed by some of my friends that this is a “really spicy chili”.  Other friends answer that with “No way, it’s just enough heat to be a chili”.   I don’t think it is particularly spicy, and several of my kids enjoy it.  However, if you are not a fan of spice, and don’t want the jalapenos, you can leave them out or replace them with mild green chilis.  Or you can make it as listed and add a dollop of sour cream and some cheese to your bowl to mild it out a little.  Your mileage may vary, and everyone’s tastes are different.  As always, alter any of my recipes to your own taste, pallet, profile, etc.

Family Friendly Chili
Author: 
Recipe type: Entree
Cuisine: American
Prep time: 
Cook time: 
Total time: 
Serves: 4 quarts
 
half alarm meaty chili aimed at families
Ingredients
  • 3 lbs hamburger
  • ½ lb bacon
  • 1 - 28 oz can crushed tomatoes

  • 3 - 15 oz cans beans (2 red kidney beans and 1 black beans)
  • 1 - 4 oz can diced jalapenos
  • 3 cloves garlic

  • 1 large onion
  • 1 green pepper

  • 1 Tablespoon sugar
  • 1 Tablespoon Apple Cider Vinegar
  • ½ Tablespoon Worcestershire sauce
  • 2 teaspoons salt
  • 1 teaspoon black pepper
  • 1 Tablespoon Chili Powder
  • ¾ teaspoon Oregano
  • ½ teaspoon Cumin
  • ⅜ teaspoon paprika (or smoked paprika)
  • 3/16 teaspoon thyme
  • 2 Tablespoons Corn Starch
  • 2 Tablespoon cold water
Instructions
  1. Chop up the bacon. Put bacon, hamburger and crushed tomatoes into a crock pot and cook until done falling apart, mixing together, but not all mush). Frozen hamburger can be on high for about 3-4 hours or low overnight)
  2. Once the meat is done, stir in the beans, jalapenos, and garlic. I drain the beans and jalapenos, but if you want a less thick chili don't drain the beans, and if you want a slightly spicier chili, don't drain the jalapenos.
  3. Chop the onions and green pepper and saute in a skillet until they are soft. Stir in to the chili.
  4. Add the rest of the ingredients (minus the corn starch and cold water) to the chili, and stir them in. If you can wait, let it simmer in the crockpot on high for an hour or two. Once the simmer part is done, mix the corn starch and cold water together until there are no lumps, and stir it into the hot chili.
  5. Serve with sour cream and cheese.
  6. If you want it even better, put it in the fridge overnight, and reheat it before serving. The flavors will blend and you will have a better chili.


Fettuccine Alfredo

fettuccine alfredoWho isn’t a fan of Fettuccine Alfredo?  It’s creamy, cheesy, warm, and delicious.  And it is such a simple perfection; how would you improve on it?

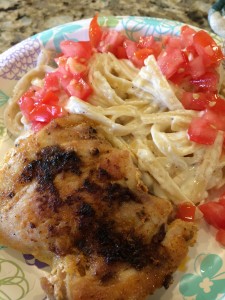
Easy.  Let people do with it as they want to.  Set out bowls of anything you can imagine would be good with Alfredo, and let people mix it up as they want.  Peas, broccoli florets, bacon crumbles, sauteed mushrooms.  My mouth waters just thinking about it.  But my favorite is always Blackened Cajun Chicken thighs and tomatoes.  Let the creamy Alfredo cool off the spicy cajun seasonings, with some ripe tomatoes to bring it all together.

To over simplify the experience, it’s awesome!

Start by mixing up the cajun spice blend.

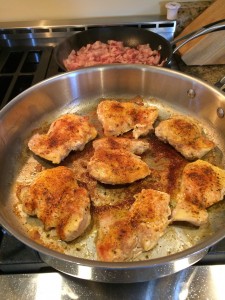
Pat the chicken thighs with a paper towel so they are somewhat dry.  Sprinkle some Cajun seasoning on it and slap it into a hot skillet.  The amount of spice used depends on your heat tolerance, but a gentle even coating will go a long way (more than you would salt it, less than a dry rub).  Cook them until they are cooked through, then turn up the heat a little and sear them until the spices turn a dark brown.  You can go all the way to blackened (as per the name) but I am not a fan of smoke in the house if I don’t have to. 😀

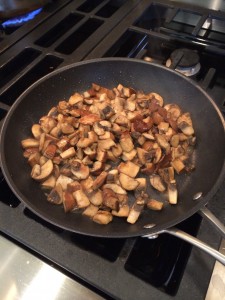
fettuccine alfredoNow chop all the vegetables that you want and put them in individual bowls.  Don’t forget to saute the mushrooms (if you like the fungus)!

fettuccine alfredo fettuccine alfredo

Now make the Fettuccine Alfredo!  This part is usually last, because it cools quickly, and if it sits around it can resemble glue.  Don’t worry if it does that!  You can plan for it!  Just keep about a cup of the water from cooking the pasta, and set it aside.  if the Alfredo gets too thick, you can add a little of the water and stir it in.  Like magic, it will be perfect again!

fettuccine alfredoOK, we all know it isn’t considered good for you.  But that’s fine; just don’t eat it every day, and eat it in moderation.  Yeah, there is an entire sermon in that statement, maybe later. 😀

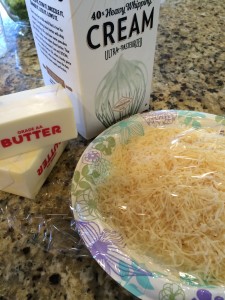
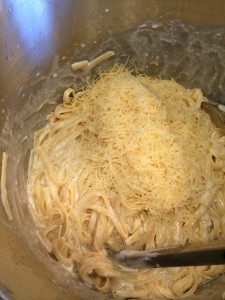
Cook the pasta.  Save a cup of the water, and drain the pasta.  Then you put in the butter, and let it melt.  Toss the pasta in the butter.  Now pour in the cream, salt and pepper.  Toss the pasta in the cream.  Add the grated cheese and stir together over low heat, and watch it all come together.

fettuccine alfredo fettuccine alfredo

Adjust for salt and pepper if you need to.  Don’t be shy, as it can take more seasoning than you think.  Just taste it as you go; nobody likes salty Alfredo.  (Who am I kidding?  It would have to be like a salt-lick for me to stay away!)

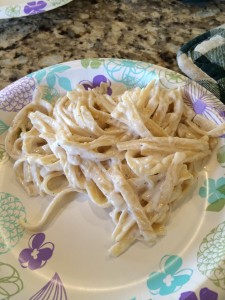
Serve immediately, and let people mix and match whatever they want.  This one is my favorite.  You should go find what is yours.

fettuccine alfredo

Fettuccine Alfredo
Author: 
Recipe type: Entree
Cuisine: Italian
Prep time: 
Cook time: 
Total time: 
 
Classic creamy Italian comfort food.
Ingredients
  • 1 lb pasta, cooked and drained, still hot (saving 1 cup of it's water)
  • ½ cup butter (1 stick), cut up
  • 1¼ cup heavy cream
  • 1 cup Parmesan-Reggiano Cheese, finely grated
  • salt and pepper to taste
Instructions
  1. Add butter to the hot pasta. Allow to melt, and stir together.
  2. Add cream, salt and pepper. Stir together.
  3. Add Parmesan-Reggiano Cheese; gently stir together until it forms a cream sauce.
  4. If sauce becomes too thick, add some of the water and stir.